

Today we’re talking about the stock market! Just kidding. Exactly as the title suggests, we’re going to show you how we earned some really useful extra storage in our new kitchen by upgrading a formerly VERY PACKED utility closet. It used to basically just have a water heater and an HVAC system in it without much room for anything else, and now there’s, say it with me… so much room for activities. Ok, not for like cartwheels, but significantly more room to store stuff than before. Like maybe 500% more. Really.
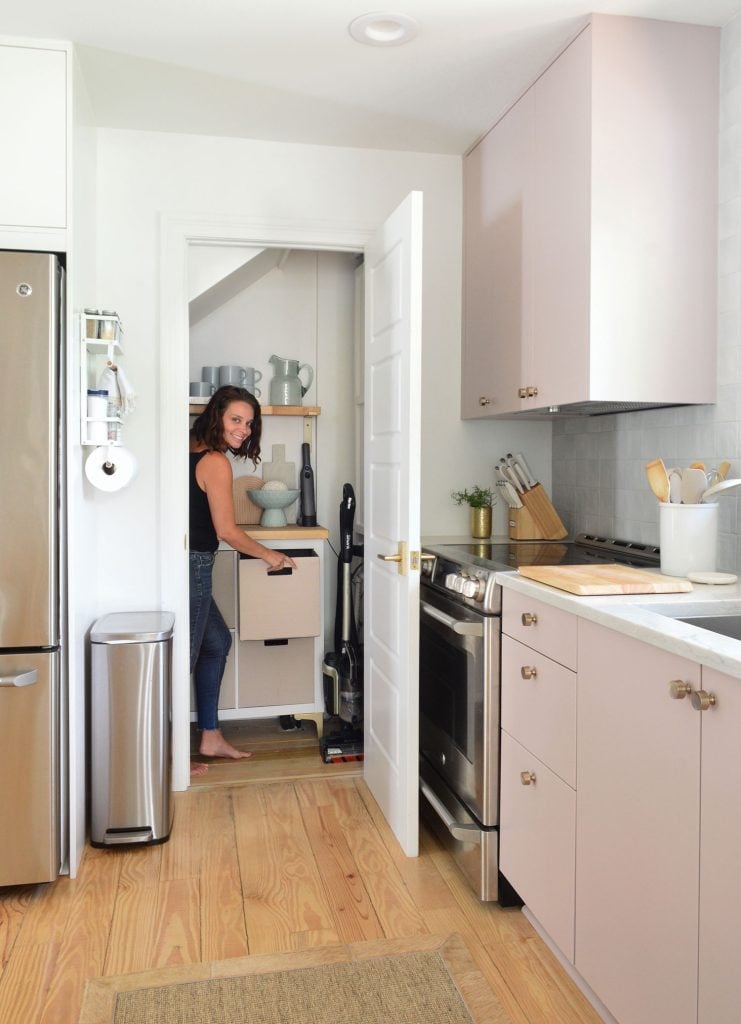
If you watched our drawer-by-drawer kitchen organization video, you already got a peek at what we have going on in there, but today we’re sharing all the angles, and explaining how we were able to take this closet from “mostly water heater” to “so much everything else.”
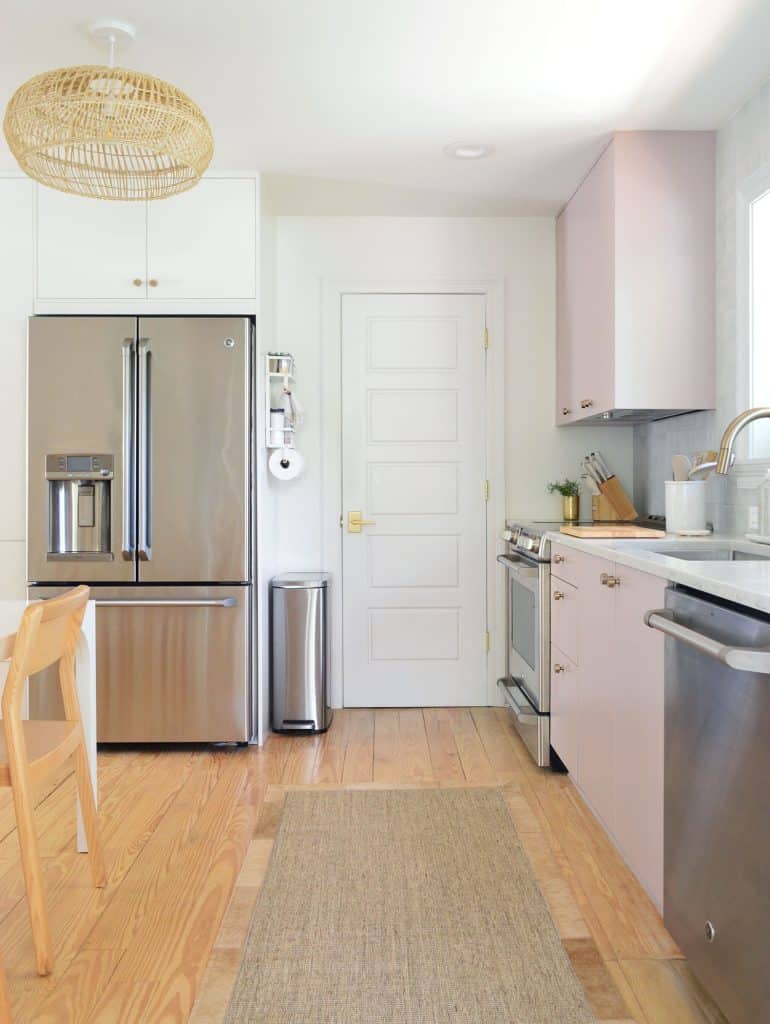
The Utility Closet Before
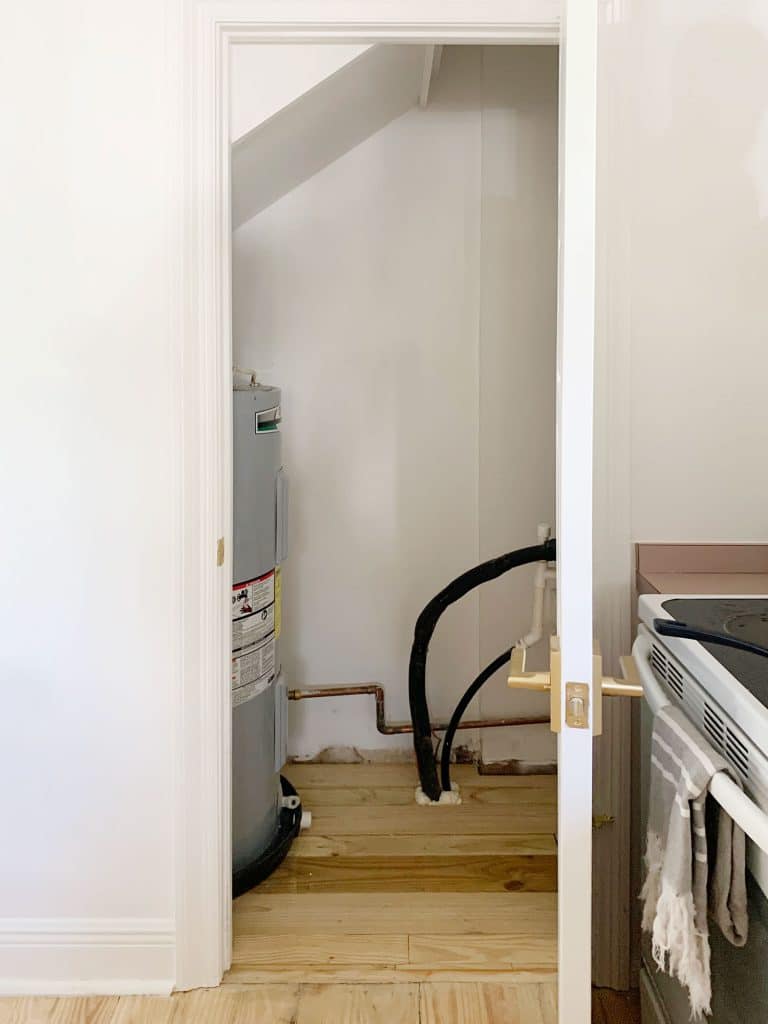
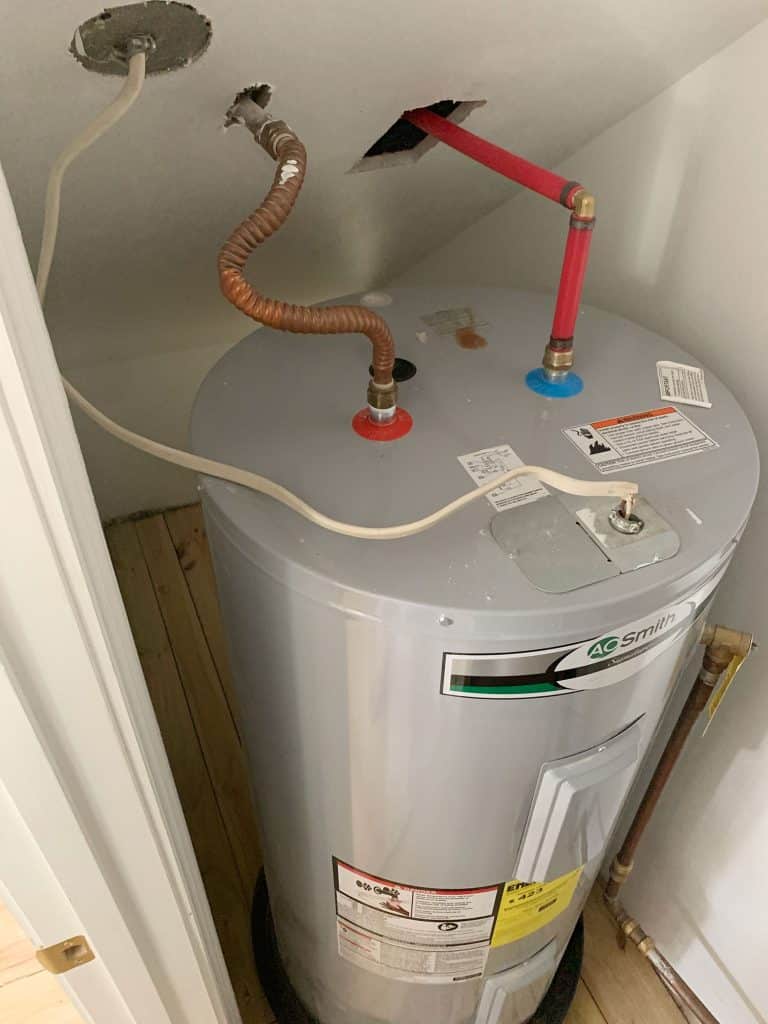
We don’t have a lot of “before” photos of this closet because it was absolutely nothing to write home about. In a smaller house like ours, you need a spot for the ugly stuff like the HVAC system and the water heater and this closet was it. The photo below was taken right after we moved in. The HVAC system is to the right of that doorframe (the black tubes lead to it) and although this closet is pretty deep (it goes all the way under the stairs), the water heater completely blocked more than half of the closet that continues to the left of the doorframe.
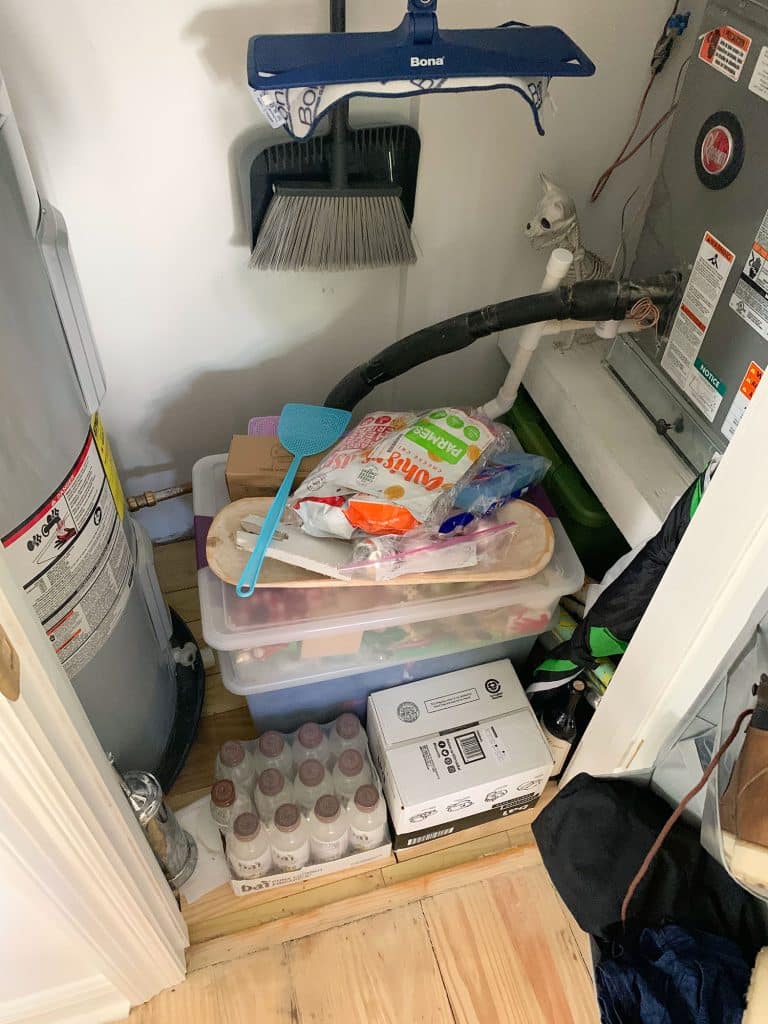
This is an example of an extremely random pile of stuff we stored in there on that random patch of floor space between the water heater and the HVAC system in our first few days of living here. I think it was mostly bins of Christmas stuff and miscellaneous items we hadn’t found a spot for yet. Don’t mind the (not real) chihuahua skeleton. Our Halloween stuff now lives in a fabric bin in the laundry closet with the easter eggs and our pumpkin carving tools. And all of our Christmas stuff is in one of the wardrobes in our bedroom. Our house’s organization had nowhere to go but up from the day we took this photo.
I already mentioned the most frustrating thing about this set-up, which is that the water heater was blocking A LOT of potential storage space under the stairs, rendering it totally inaccessible and unusable. And especially in a smaller house, it’s painful to know that there’s a big empty cavity of perfectly functional storage space THAT YOU CAN’T GET TO.
So that leads us to the first step in our mini makeover…
Step 1: Update (& Relocate) The Water Heater
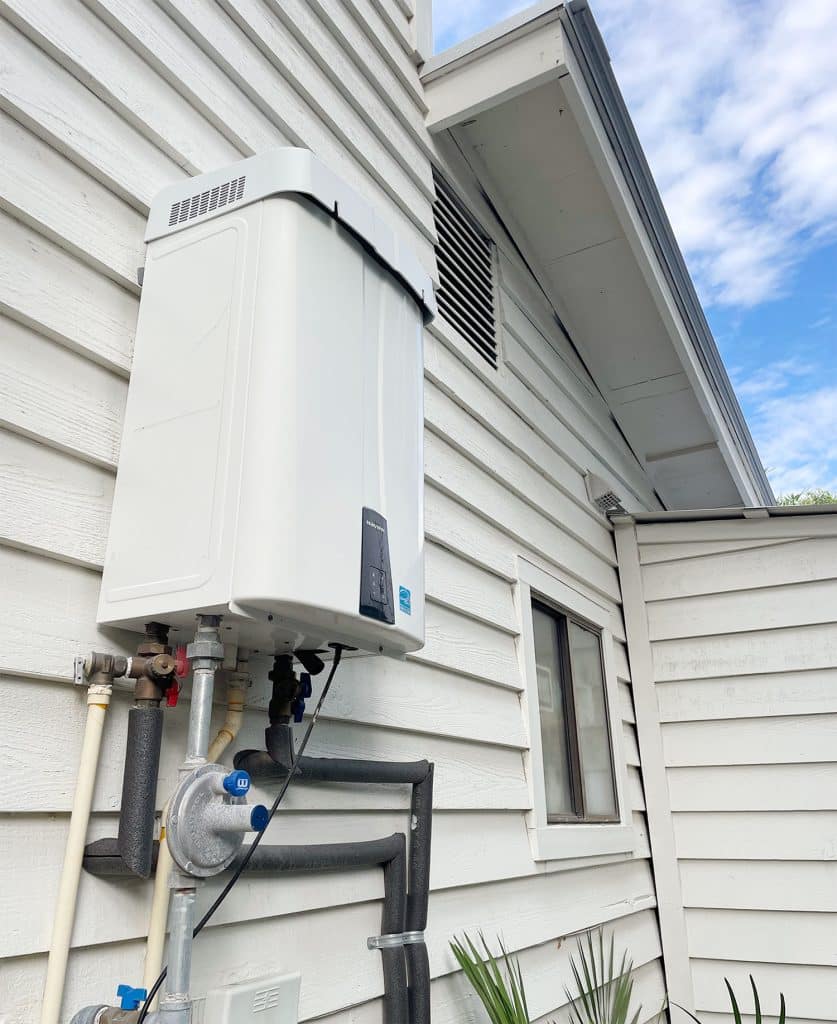
In a move that can only be called the MVP of this project, we had that bulky electric water heater replaced with a more energy-efficient tankless model. We used tankless water heaters in our pink beach house and our duplex (see below), so we knew it would take up a lot less space and give us better access to the back of the closet if the switch could be made.
And – to our pleasant surprise! – we learned that tankless water heaters are typically installed on the OUTSIDE of homes around here (call us Florida novices). Thar she blows, mounted to the siding right outside of that closet on the back of our house where we put all the ugly stuff because nobody can really see it (it’s also where our pool equipment, gas meter, and generator live – all hidden behind a tall gate).
So not only had we earned a much more efficient water heater, we suddenly gained access to TONS of extra storage space that runs all the way under the stairs. Which, when you downsize, is basically your love language.
We did our best to take advantage of the new space, but it was kind of a slapdash approach for a while because we weren’t quite sure what would work best. We hung some wire shelves to wrangle tools and miscellaneous supplies & threw some larger items we wanted to store in that newly accessible area under the stairs, but it was clearly a chaotic vibe (and not the best way to store that stuff, we pretty quickly realized), hence having zero photos of it. This is actually an old video screenshot from a quick spin around the house that Sherry does for insurance purposes every time we leave on a trip because Shavonda says so. Note: the theory is if you’ve recently recorded every nook & cranny of your house, you have that to reference if something happens while you’re gone, and you can show your insurance carrier to make sure they reimburse you for all the items you lost (which you won’t forget, because you have it all on tape).
We lived with things like that for a while, knowing it wasn’t working flawlessly, but also trying not to rush into some other idea that also wouldn’t work well, and over time as the rest of the kitchen renovation started to come together, we had more clarity on how we wanted to use this bonus space. And let’s just say it didn’t involve shallow wire shelving.
But before we could bring in some better-looking storage, we had a few things in our way. Quite literally.
Step 2: Reroute The Pipes & Wires
The closet still had various wires, tubes, and pipes that prevented us from putting things where we wanted them. So we paid around $280 to get two pros to come out and move them for us. First our favorite HVAC guys rerouted the thick black tubing and white pipe for the HVAC system as far to the right side as possible (so they no longer arc out so widely into the closet). Note: never compromise your system by changing things with a handyman or DIY if you’re not sure how that system works. We always use a really good HVAC guy when we’re making HVAC changes because a comfortable house temp is key 😉
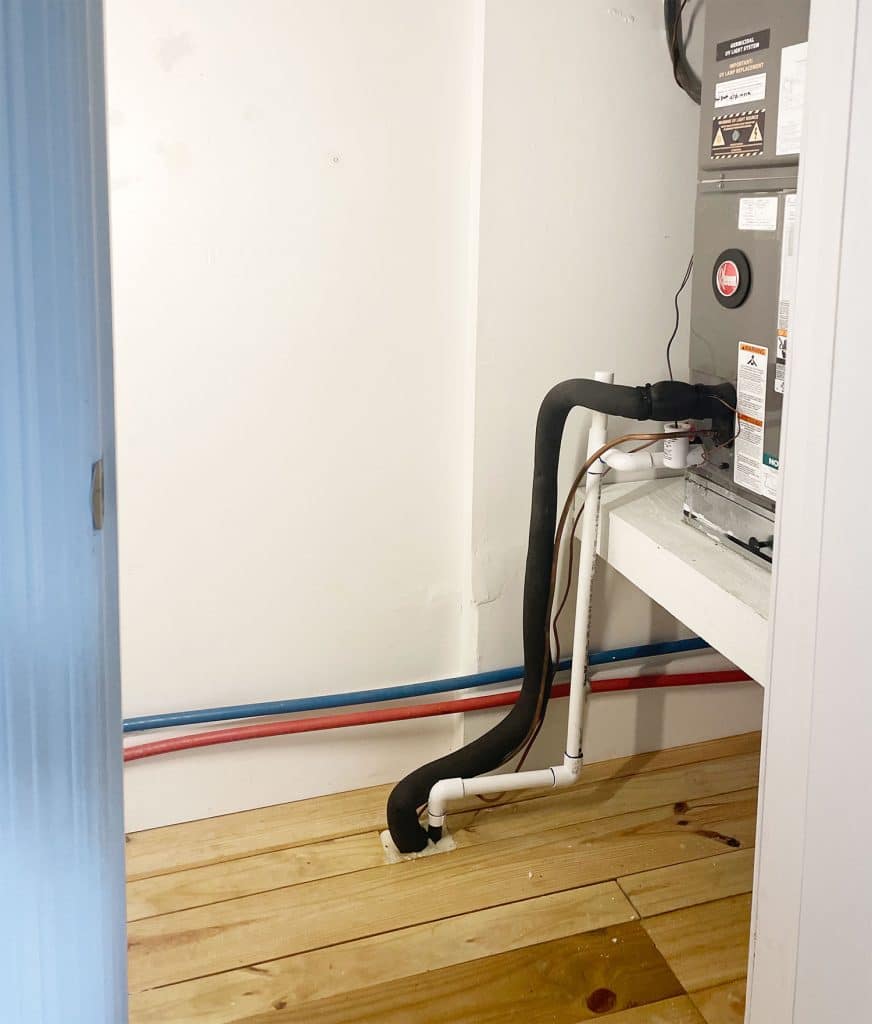
Later that same day we had our favorite plumber out to re-route the water lines that run out to our tankless water heater, so those water lines are no longer obstructing the back wall at all. We hid them behind the doorway so you can’t even see it from the kitchen anymore! See the blue and red water lines that run above the baseboards in the photo above? Now they sneakily snake behind the doorway (they’re those clear tubes you see in this photo below):
So with everything out of the way, we were finally able to get to the fun part…
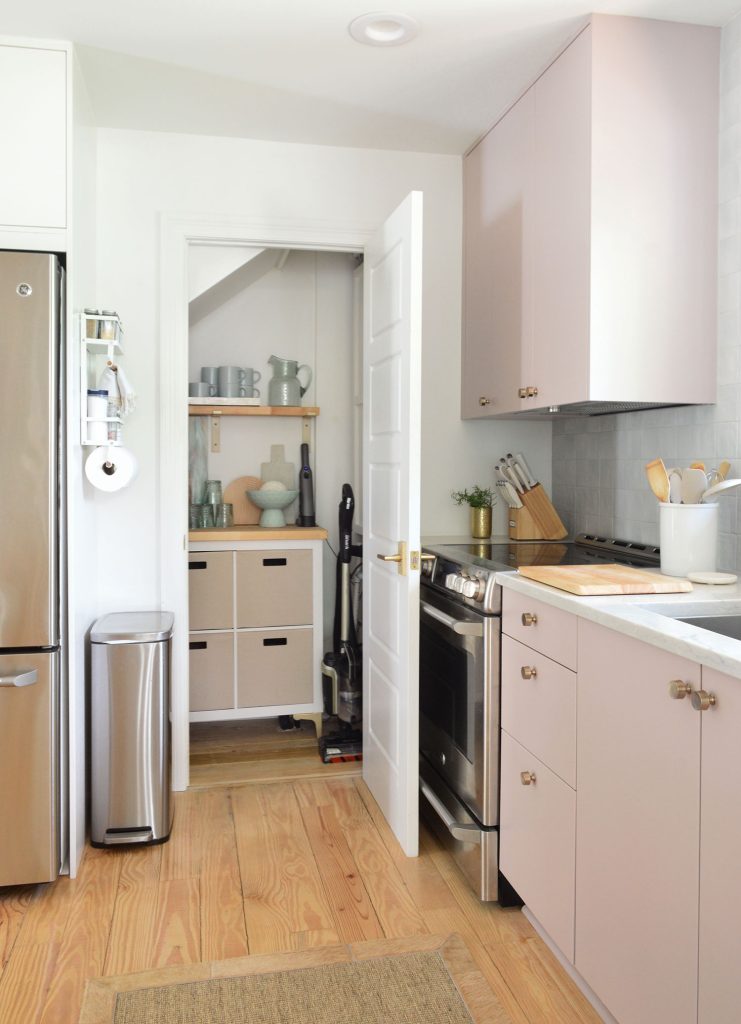
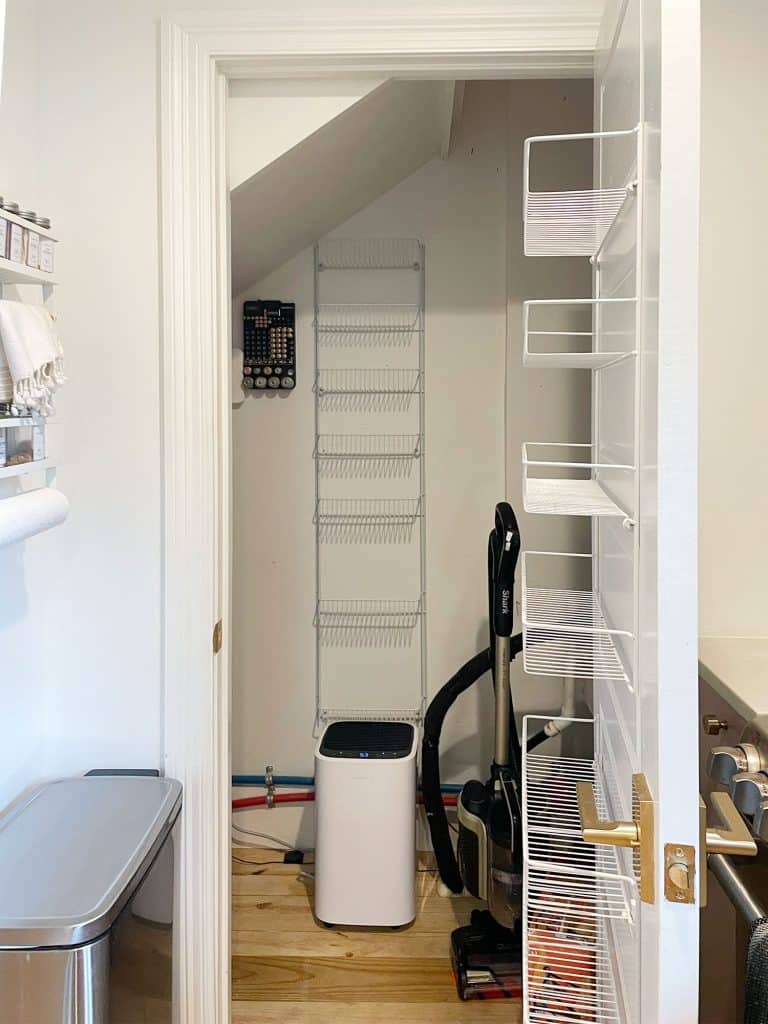
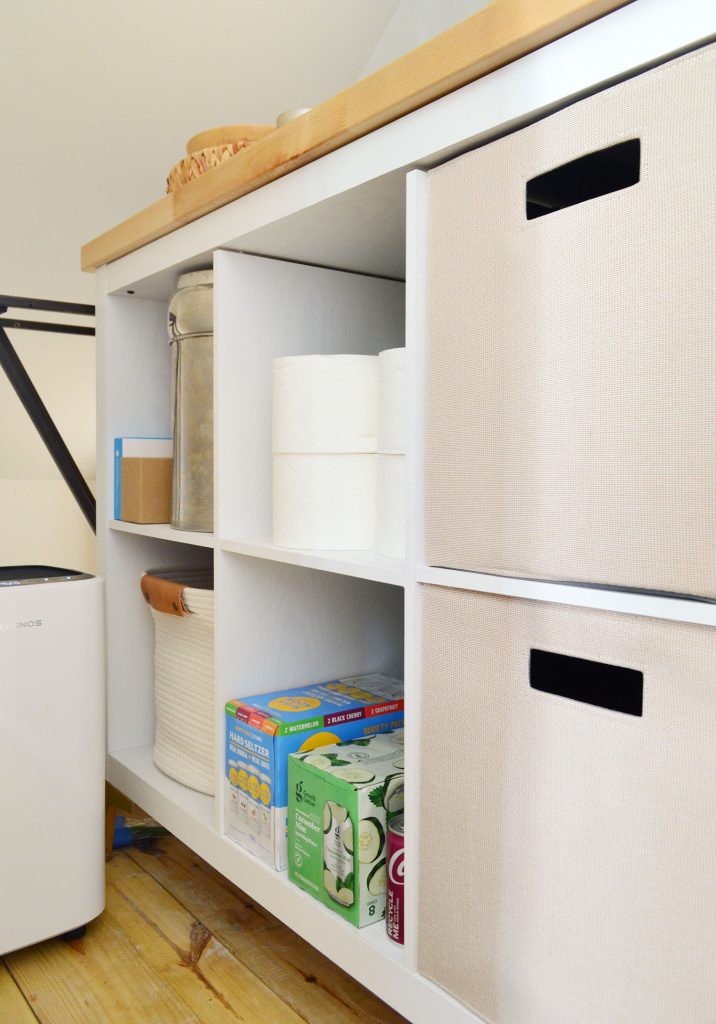
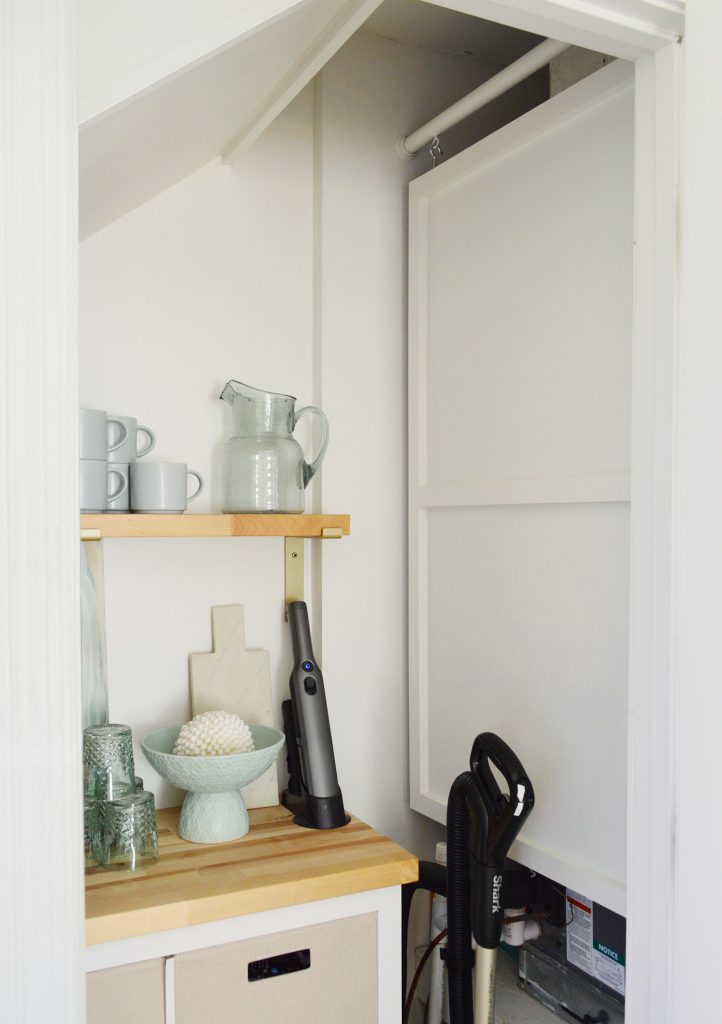
Step 3: Customize A Cube Storage Shelf
Hold onto your butts, because this is where it starts to get even more exciting.
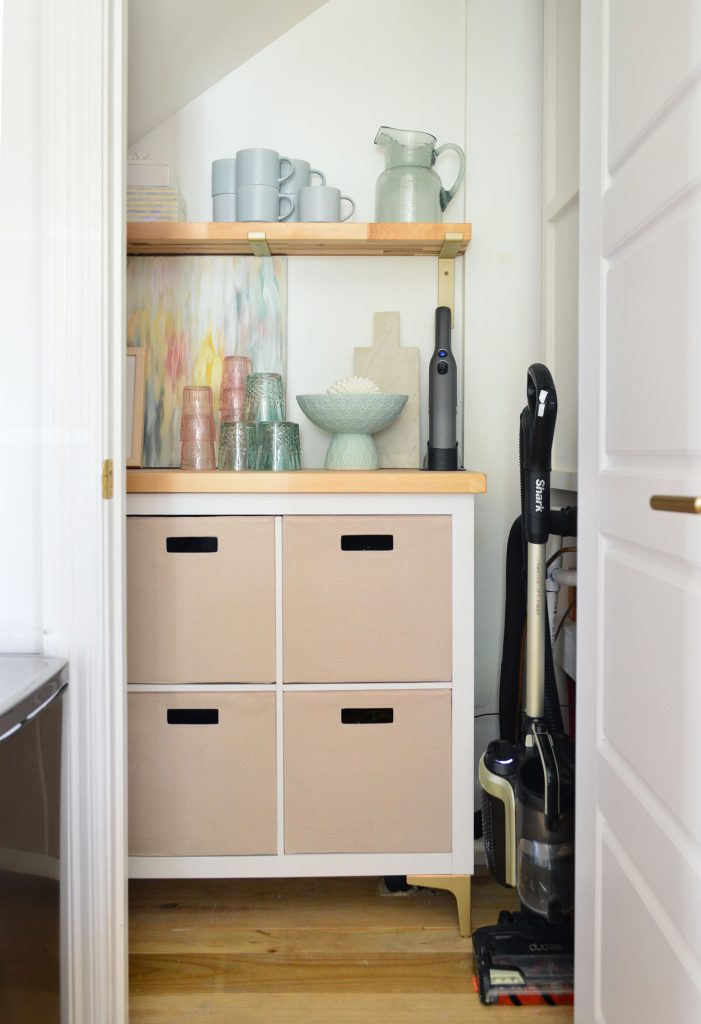
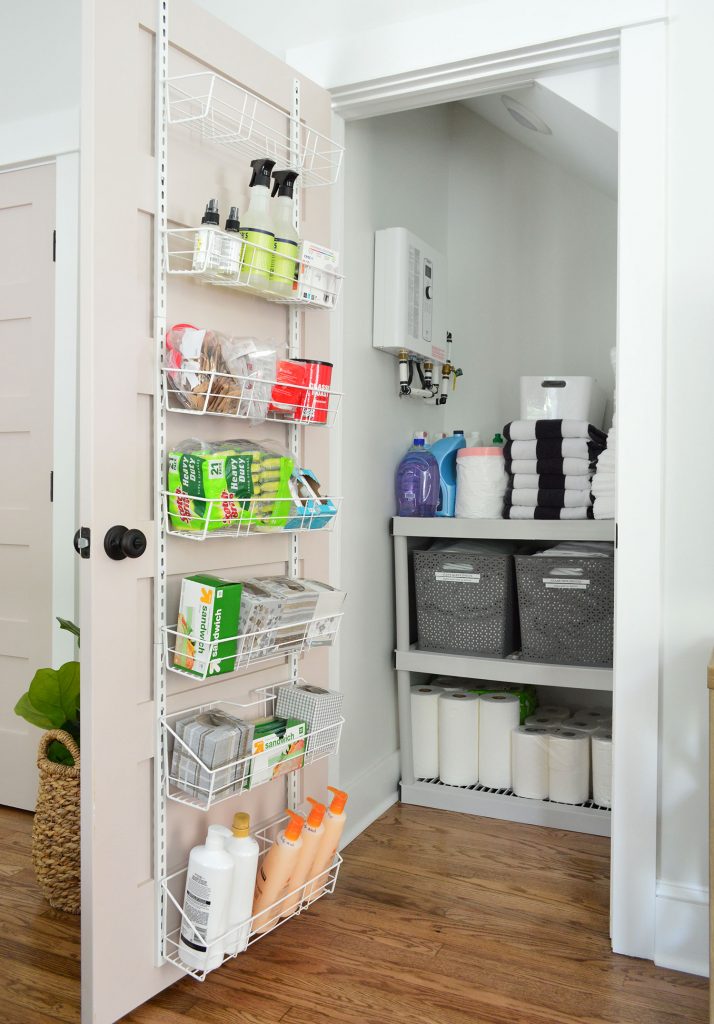
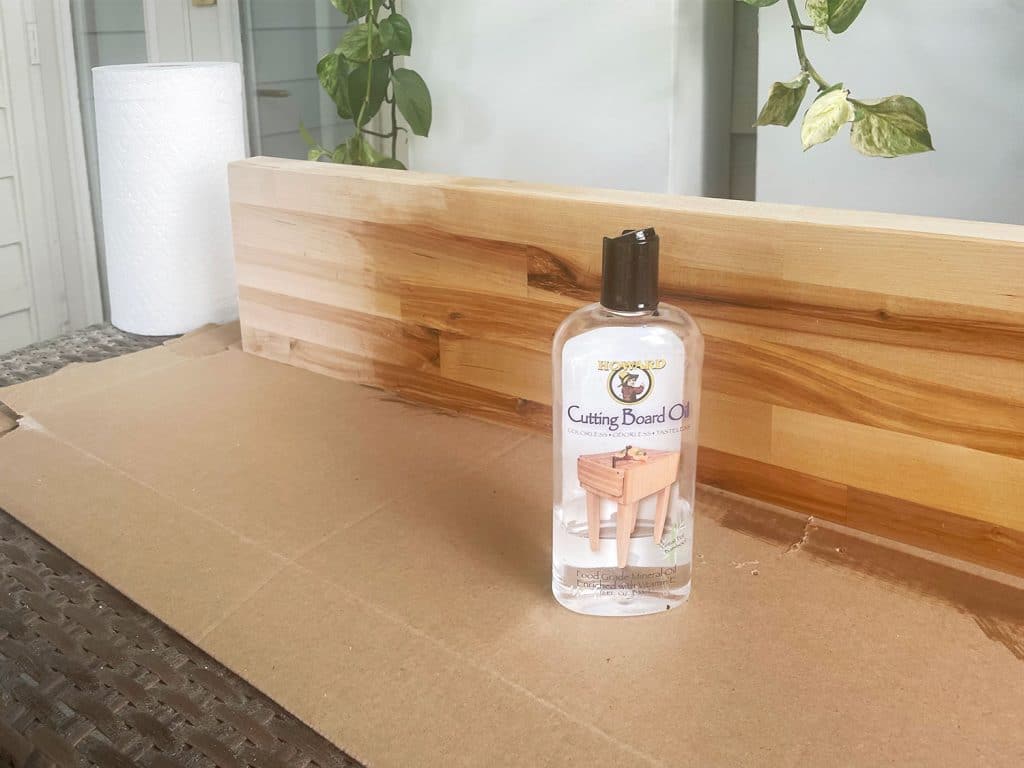
We upgraded from that shallow wire wall storage to a basic cube shelf organizer – and we made it look a little less-than-basic by adding 5″ brass furniture legs and topping it with a piece of butcher block counter that we cut to size and sealed with 2 coats of cutting board oil (it always dries a little lighter once it’s soaked in).
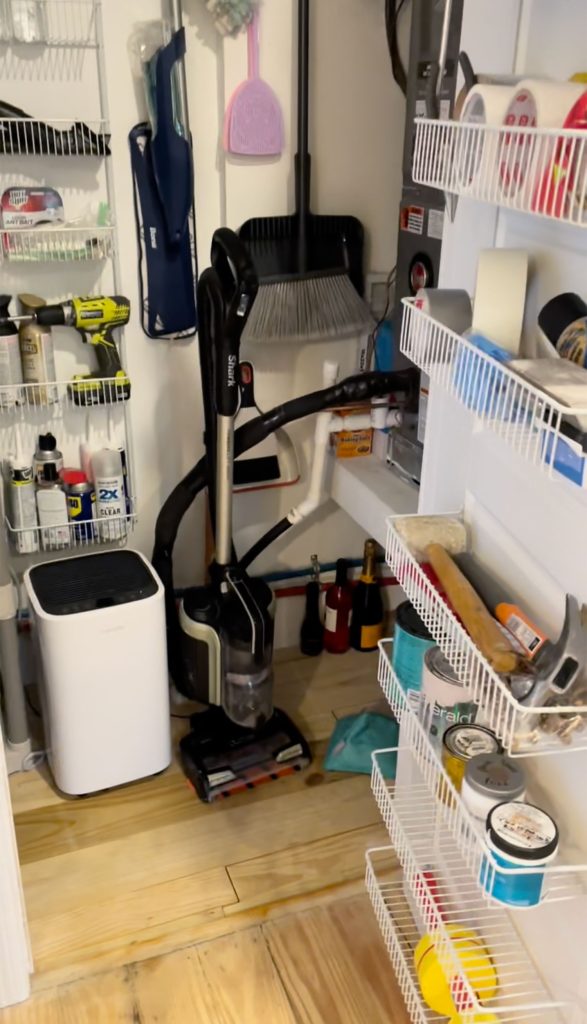
Since you can see 4 of the 8 cubes when the closet door is open, we used matching taupe fabric bins to make the things look tidier than they really are. Those bins hold SO MUCH STUFF. Absolutely thrilling.
We use one of them to store dog food & treats, another one has our steamer & vacuum attachments, one has random things like spray paint & caulk & our a caulk gun. Let’s just say it’s about 5X more pleasurable than trying to balance that stuff in shallow wire shelves (which never could hold our dog food anyway).

We left the other 4 cubes bin-less and open, and those also hold a smorgasbord of stuff like extra toilet paper, overflow beverages, emergency supplies, and even our Berkey water filter. A few people have asked what happened to it since it’s not out on our counter anymore, and the answer is that during the final stage of our kitchen reno, we finally ran a waterline to our fridge (which created filtered always-cold water on demand – plus ICE!). After over two years without one, having a cold water & ice dispenser has been awesome. The fridge also dispenses hot water for tea so it has basically changed our lives. If this were Cribs on MTV I would welcome you in and talk about my fridge for ten minutes.
Anyway, back to the Berkey. We had it assembled on the counter in the utility closet for a while, but we all tended to just use the fridge when we wanted a drink. But we love our Berkey so we’re keeping it in case we ever need a truly amazing water filter (it can literally make pond water potable!), like a hurricane or other emergency. We have one cube dedicated to hurricane supplies where it sits, which also holds a crank radio, a solar-powered charger, some flashlights, etc.
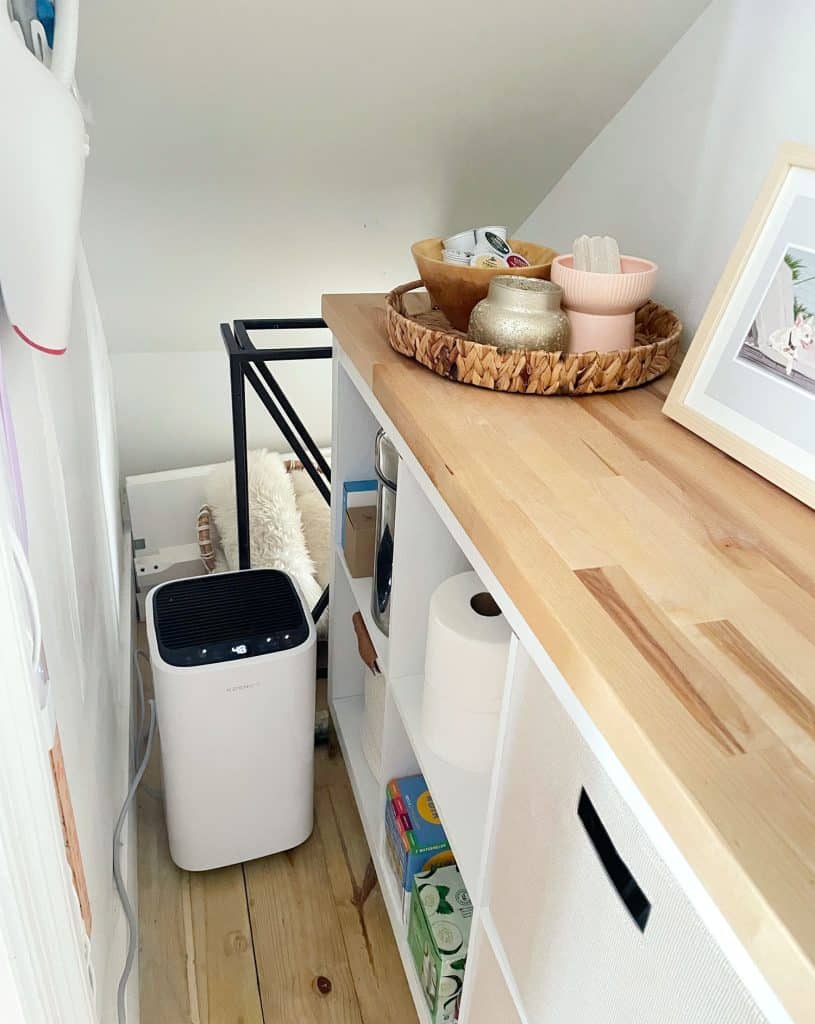
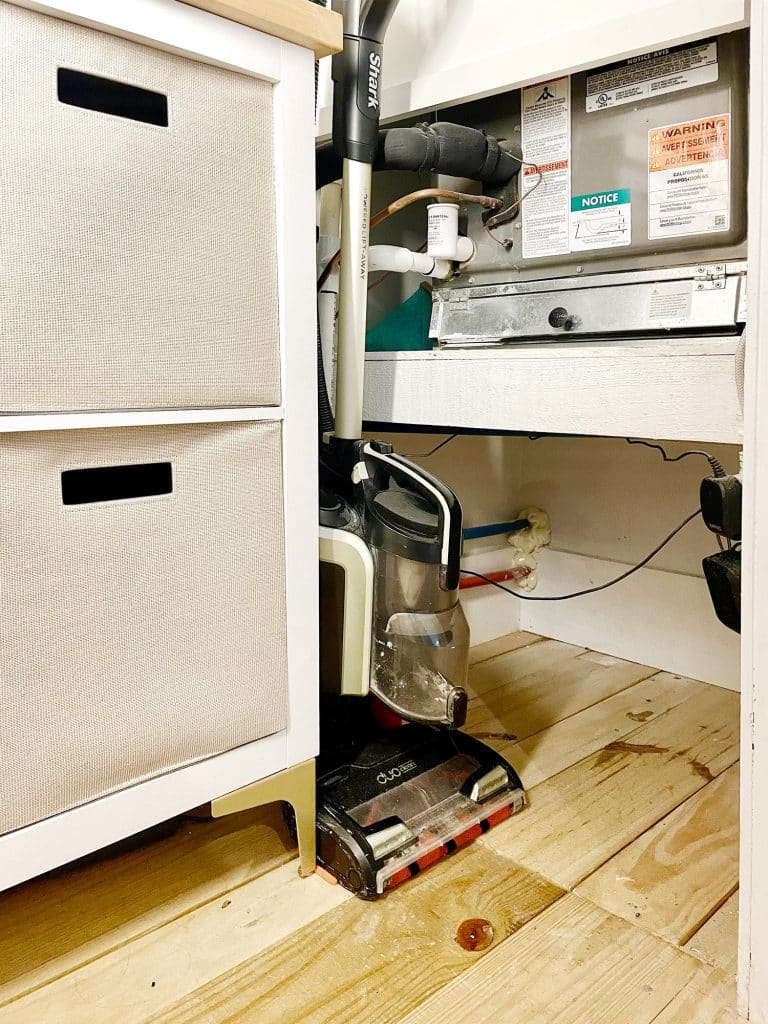
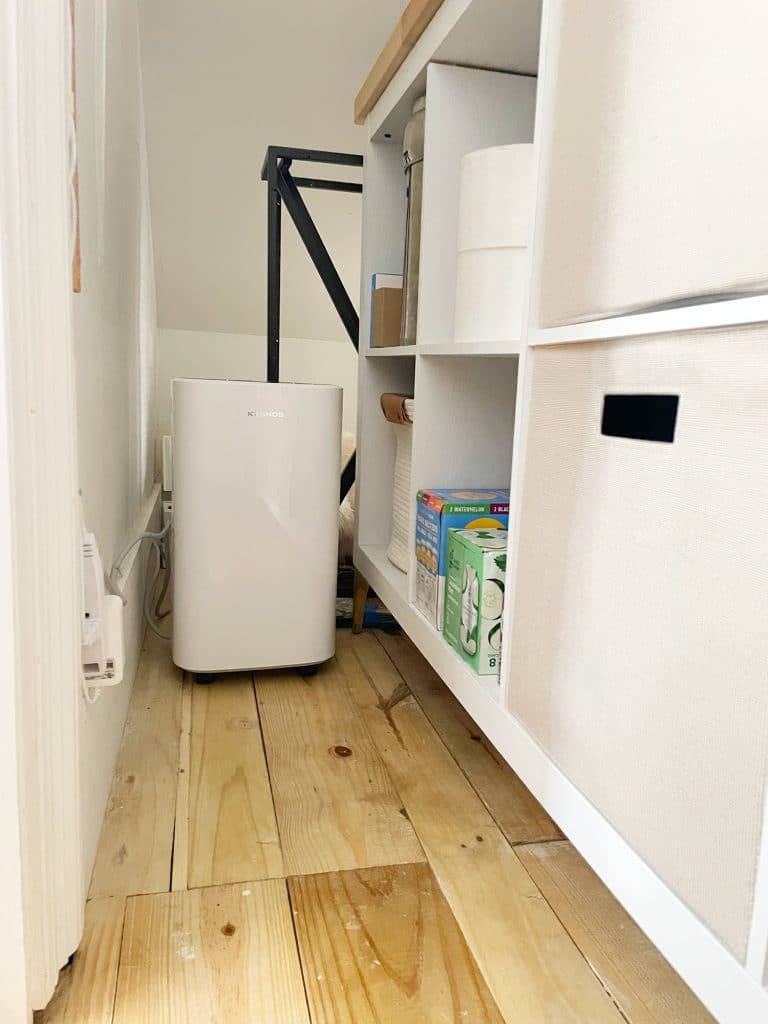
There’s additional space beyond the storage shelf for some random bigger stuff to sit on the floor. And yes, that’s a dehumidifier that you see running because, well, Florida. Since it sits between the intake vent and our HVAC unit, it actually helps dehumidify the whole house.
And as a reminder, this used to be the view from this angle. So yeah… big difference.
Step 4: Add A Floating Shelf
Honestly, the cube organizer turned out to be more-than-enough storage for us at the moment, but we had some extra butcher block after we made the counter and we thought it would be nice to add a shelf for even more vertical storage.
We created a simple shelf with the help of these metal shelf brackets that we spray-painted Rust-Oleum’s Sunlit Brass to match the feet that we added to the cube storage shelf below. We actually used the same paint on the metal legs on the cube shelf after realizing they were more of an orange brass, and now everything matches.
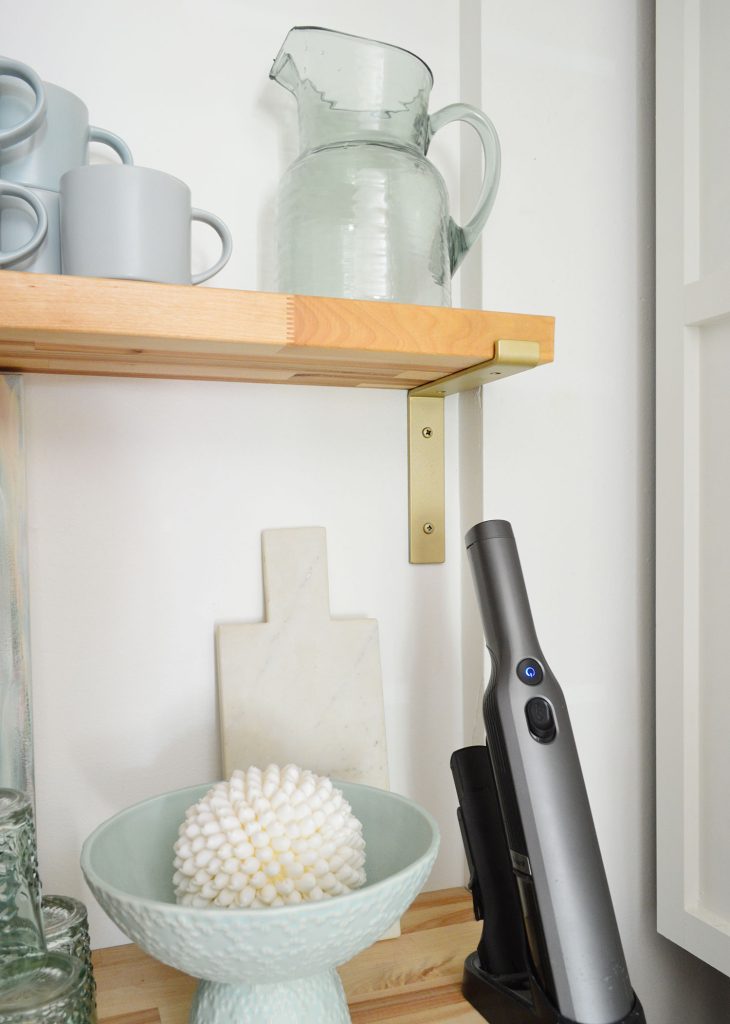
The shelf and the countertop do store some functional things, like mugs and extra cups, a pitcher Sherry uses to water her 438 plants, and a handheld vacuum that’s easy for the kids to use. But Sherry threw some decorative things in there too because, well, we now have room for that. This closet really went from feeling like a wasted underutilized space to giving off an almost-pantry or bonus-bar vibe that we appreciate so much.

So yeah, framed illustrations of your dog and pretty vases can live in a closet too. Live your best life.
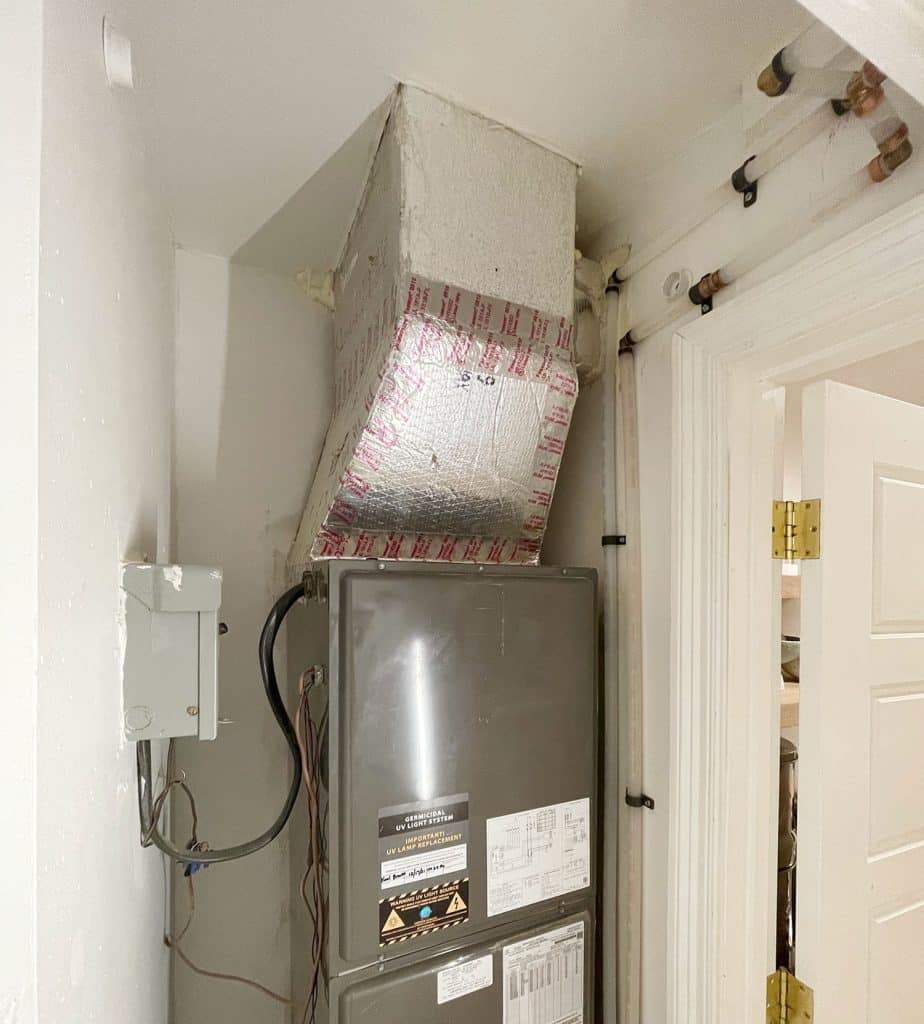
Step 5: Cover The Ugly
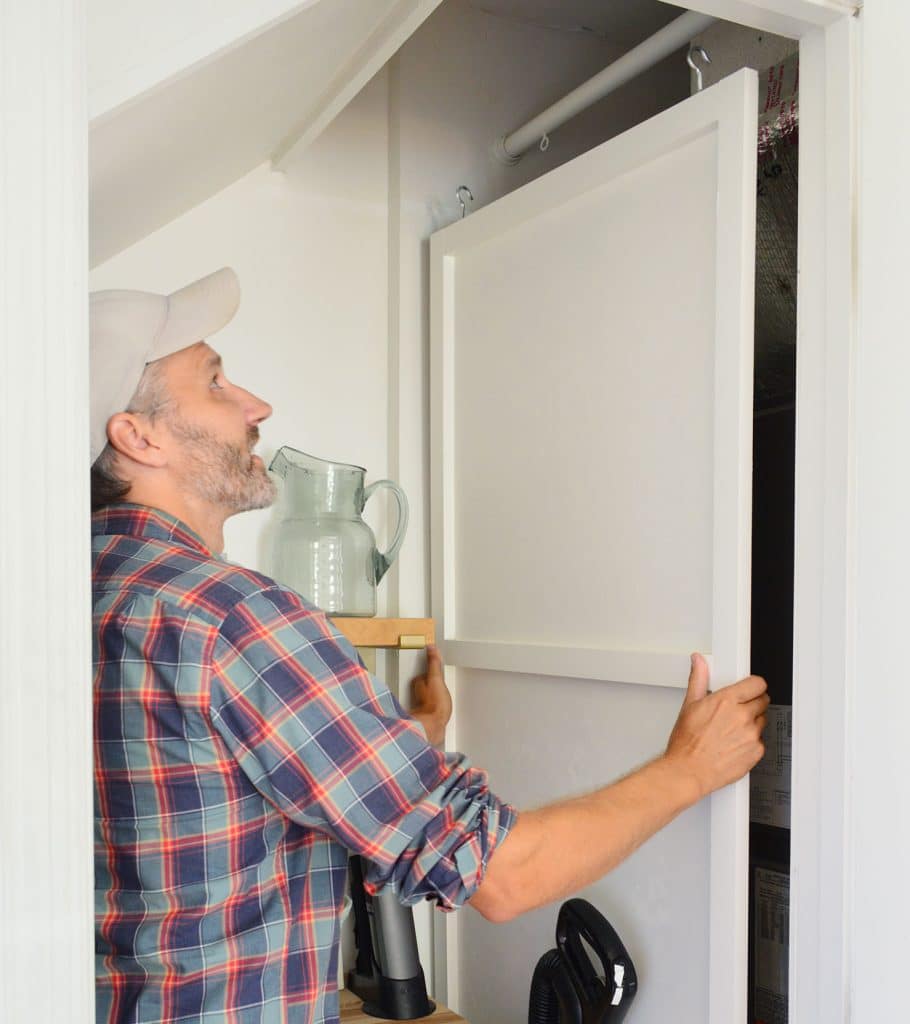
We still had that extremely utilitarian-looking HVAC unit right next to the area we had just spruced up… but I had an idea.
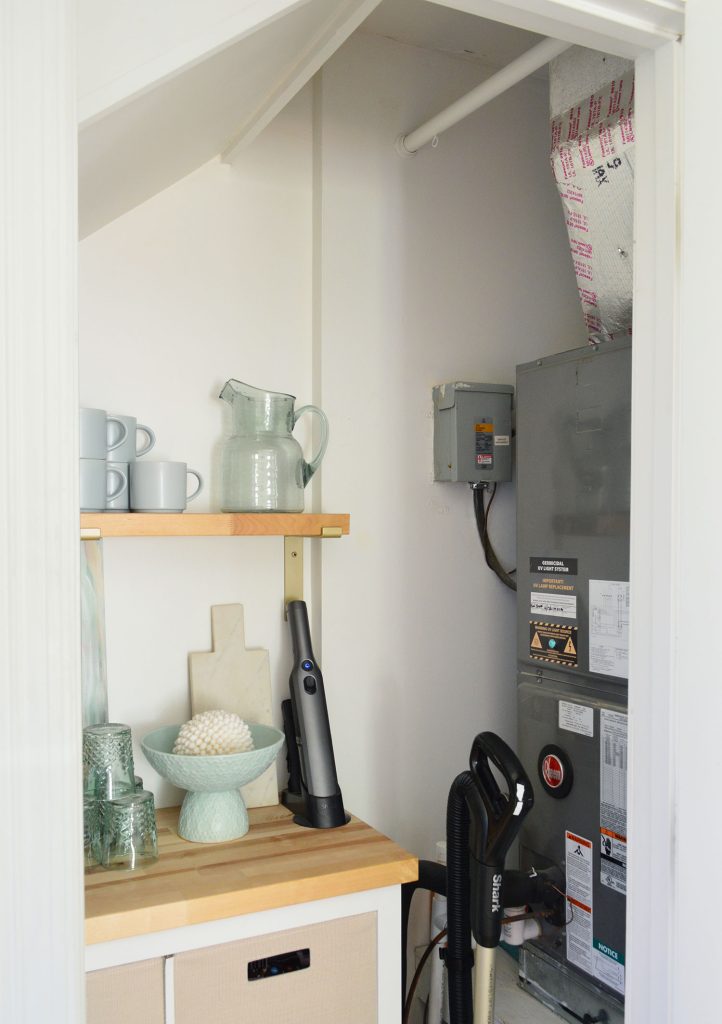
We built a simple cover panel from a sheet of thin plywood that we trimmed around the edges with 1 x 2″ boards and painted the wall color (SW Pure White).
The whole thing hangs from some eye hooks that we screwed into a basic wooden closet rod that we added near the ceiling.
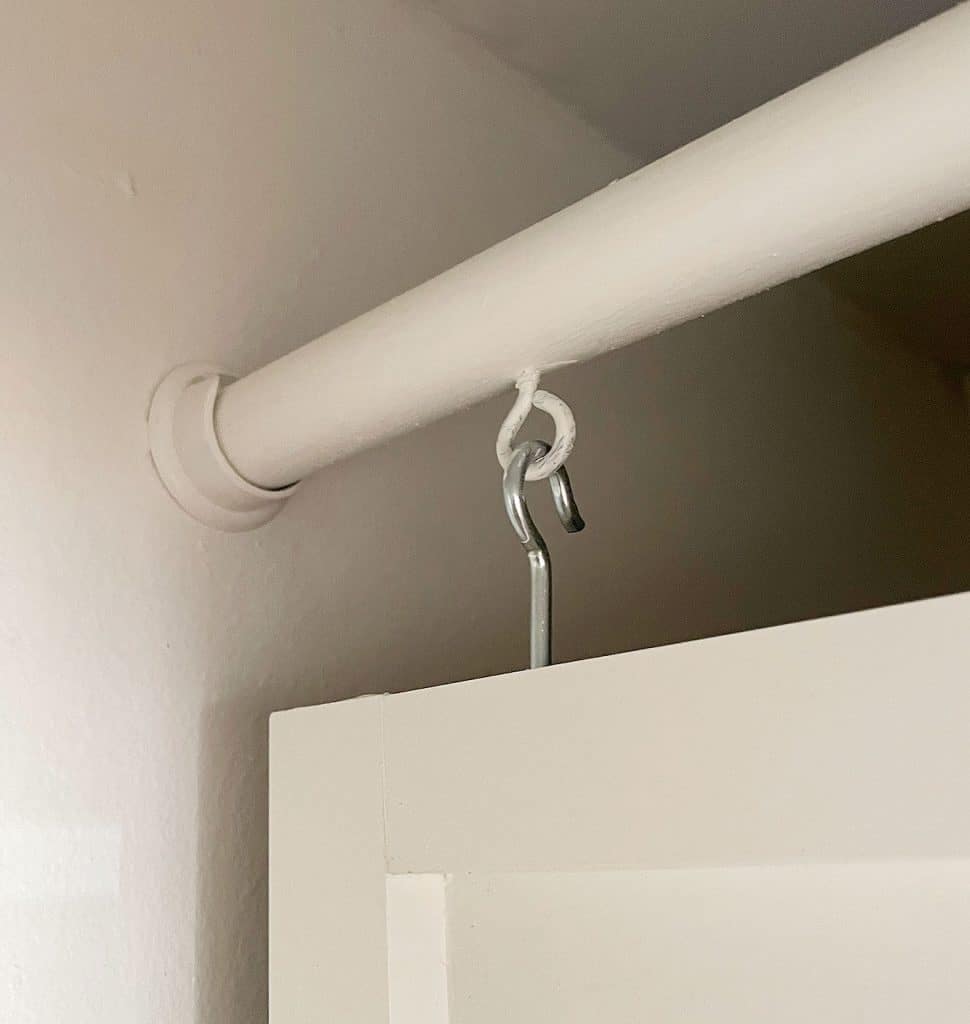
This means we can easily remove the panel whenever the HVAC unit needs to be serviced.
And, since the intake is on the bottom of the unit, it doesn’t block an inch of airflow, and we can easily change the filter without having to take it down.
The overall effect of adding that panel is surprisingly helpful. It feels MUCH less like a utility closet in here, but still has all the function.
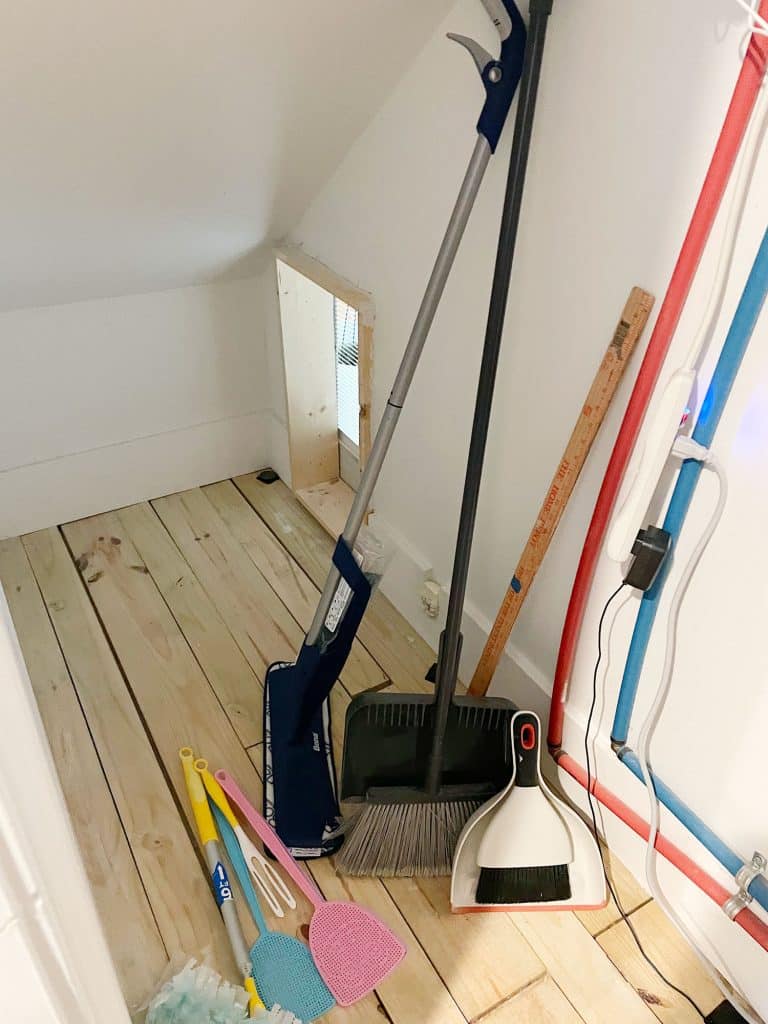
Step 6: Take Advantage of Hidden Walls
Last but not least, we utilized the inside wall (opposite the cube shelf, to the left of the doorway) to wrangle some last remaining items: a dustpan, some cleaning wands, a fly swatter… you know, the really sexy stuff.
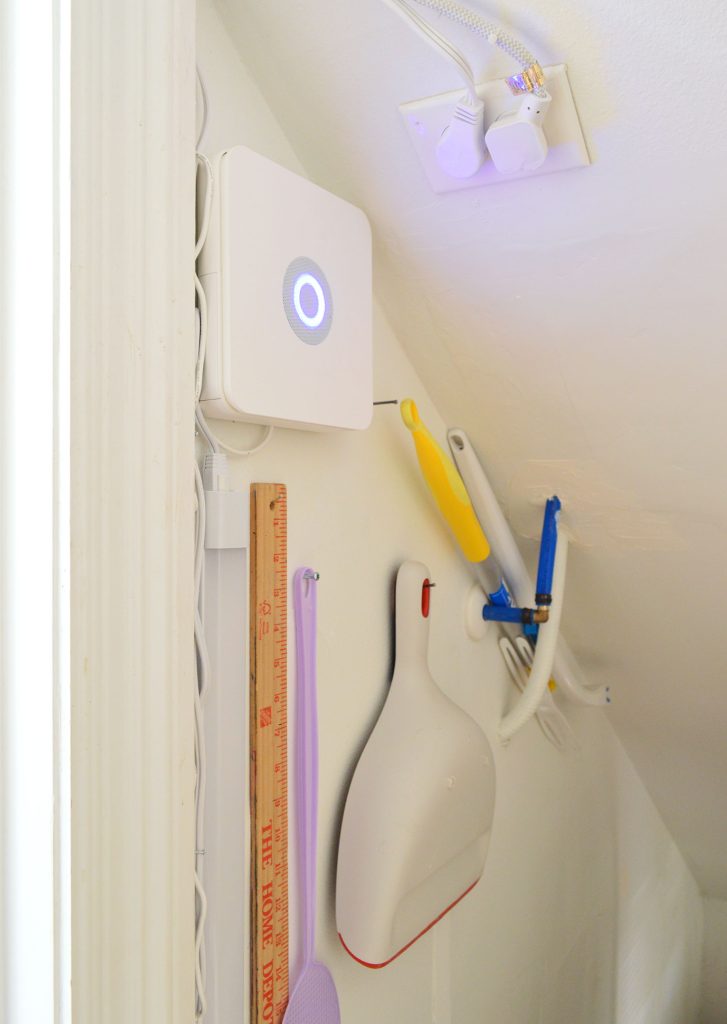
We also hung this 24″ under-cabinet light vertically along the door molding to give us some extra light in there. It just plugs into a normal outlet (we had that added when we removed the water heater since power had been run to that spot for the water heater) and it offers two brightness settings. Toggle the switch one way for 50% brightness, and toggle it the other way for 100%. This is just 50% below, so it’s PLENTY bright.

So that’s the story of how we took this unassuming utility closet that literally only had this much accessible floor space…
… and gave it quite the glow up.
As a P.S. – I know it looks incredibly shallow in there, but we can both easily stand fully within the closet, walk all the way to the back corner to get the storage items that we have back there, etc.
If it helps, here is Sherry standing inside:
Since that likely didn’t help because she’s 5’2″, I’ll repeat this picture for you, because you can see that I’m standing fully inside of the closet (see the doorframe in front of me) to remove that HVAC panel. Thrilling, right? I can fully stand in that spot without hitting my head, and both of us have to duck to get to the back of the closet since the ceiling dips down, but that’s par for the course for a closet under the stairs.
One last note about that black upright vacuum, since I know someone will ask. We broke our beloved Shark Navigator that you’ve heard us talk about approximately 42 times (it was our fault, not the vacuums’) and it was no longer sold at that moment we broke it, so we caved and got a Shark ION P50 – but don’t fall for it. The Shark Navigator is forever and always our favorite cordless vac (so glad it’s back and available again! Sherry wishes we had waited). I will admit that we rarely use a “real vacuum” now that Eufy has come into our lives, except mainly for doing the stairs (which we sometimes do with our handheld vacuum because we’re cool like that).
To read all about our kitchen renovation, this post has you covered (including the cost). And if you’d like to see how our entire kitchen is organized, we throw open all the doors & drawers right here in this post.
*This post contains affiliate links, so we may earn a small commission when you make a purchase through links on our site at no additional cost to you.


